
I still remember my first container garden: three sad tomato plants crammed into too-small pots on my apartment balcony, wondering why they looked more Charlie Brown Christmas tree than Instagram-worthy harvest. Turns out, I’d made just about every beginner mistake possible, but those scraggly plants taught me something important. Container gardening isn’t about having a green thumb or tons of space. It’s about understanding a few basic principles that transform any sunny spot into a productive garden.
Here’s what makes container gardening so perfect for beginners in 2026. You don’t need a yard, expensive equipment, or years of experience. You need containers with drainage holes, quality potting mix, and plants suited to your light conditions. That’s it. Everything else you’ll learn as you go, and trust me, the learning is half the fun.
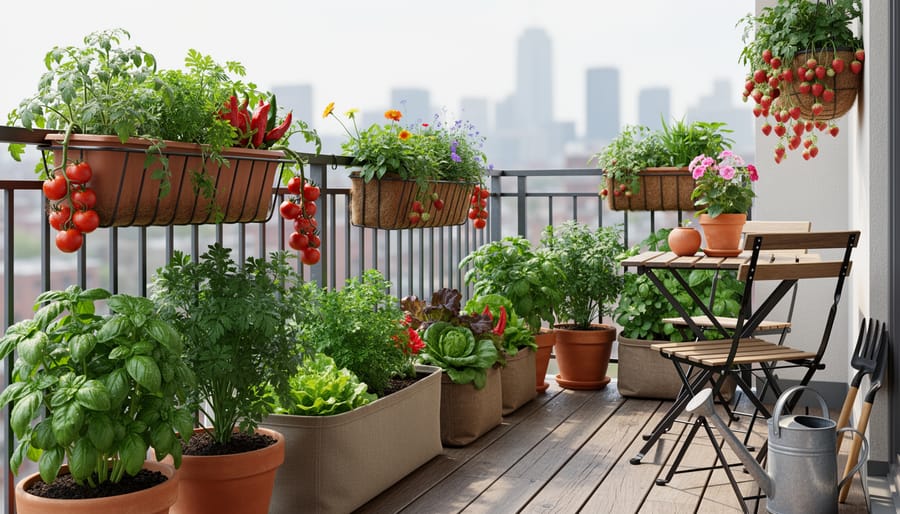
The beauty of growing in pots is the control you gain. Bad soil in your yard? Doesn’t matter. Worried about commitment? Move your containers around until you find the perfect spot. Want to start small? Begin with three pots and expand when you’re ready. I’ve seen community members transform tiny balconies into lush herb gardens and turn boring patios into vegetable havens, all starting with just a few containers and some curiosity.
What I love most about our container gardening community is how generous everyone is with their knowledge. Someone’s always experimenting with self-watering systems, testing new compact vegetable varieties, or sharing photos of their latest harvests. We’ve all killed a plant or two (or twenty), and we’re all still learning.
This guide will walk you through choosing containers, selecting the right soil, picking beginner-friendly plants, and establishing a care routine that actually fits your life. No overwhelm, no intimidation, just practical steps to get your hands dirty and your first plants thriving.
What Makes Container Gardening Perfect for Beginners in 2026
Container gardening has exploded in popularity over the past few years, and for good reason. It removes almost every barrier that traditionally keeps people from growing their own food or flowers. No yard? No problem. Limited time? Even better, containers are actually easier to manage than sprawling garden beds.
The appeal comes down to control. When you garden in containers, you’re in charge of everything: the soil quality, the drainage, the location, even the microclimate. If a plant isn’t thriving in one spot, you can move it to another in seconds. That kind of flexibility is impossible with in-ground gardens, where you’re stuck with whatever soil and sun exposure your property offers.
For beginners specifically, containers offer something invaluable: a lower-stakes learning environment. Instead of committing to tilling an entire bed or wondering if you’ll keep up with weeding a large plot, you can start with a single pot of basil on your kitchen counter. Success builds confidence, and you can expand at your own pace without feeling overwhelmed.
The timing is perfect for jumping in. Community interest has surged, with local municipalities and organizations now offering hands-on learning opportunities. The June 17, 2026 workshop at the Mel Lloyd Centre is just one example of how accessible container gardening education has become. These workshops signal a shift: growing in pots is no longer seen as a compromise but as a legitimate, desirable way to garden.
There’s also a practical advantage that often gets overlooked, pest and disease management becomes simpler in containers. You can isolate problem plants, replace soil easily if needed, and keep vulnerable seedlings out of reach of ground-dwelling critters. For someone just learning to identify garden problems, this contained environment makes troubleshooting far less intimidating.
Choosing Your First Containers: What Actually Works
Size Matters (More Than You Think)
Most beginners grab whatever pot looks cute, then wonder why their tomato plant stays stunted or their basil dies after a month. The truth is, container size directly determines whether your plants will thrive or just survive.
For herbs like basil, cilantro, or parsley, a container at least 6 inches deep and wide gives roots enough room to establish. Lettuce and shallow-rooted greens can manage in 6 to 8 inches, but anything deeper allows you to water less frequently. Match size to roots by thinking about what the plant does underground: tomatoes, peppers, and cucumbers need containers that are 12 inches deep minimum, and 5 gallons is a good starting volume. I’ve seen beginners try growing a tomato in a 1-gallon pot, and it becomes a daily watering chore that still produces maybe three sad fruits.
Bigger containers are more forgiving. They hold more soil, which retains moisture longer and buffers temperature swings. If you’re new and worried about keeping up with watering, choose larger pots over smaller ones.
Common mistakes include using matching 8-inch pots for everything regardless of plant type, or choosing a tall narrow container for a bushy plant that needs width. Wide beats deep for most vegetables and flowers. When in doubt, go one size bigger than you think you need.
The Drainage Hole Debate Settled
Every container needs drainage holes. This isn’t optional gardening wisdom, it’s plant biology. Roots sitting in waterlogged soil suffocate because they can’t access oxygen, and rot follows quickly.
I learned this the hard way with a beautiful ceramic pot I couldn’t bear to drill. The basil looked great for two weeks, then suddenly collapsed. When I tipped it out, the roots were brown mush and the soil smelled sour. One drainage hole would’ve prevented it.
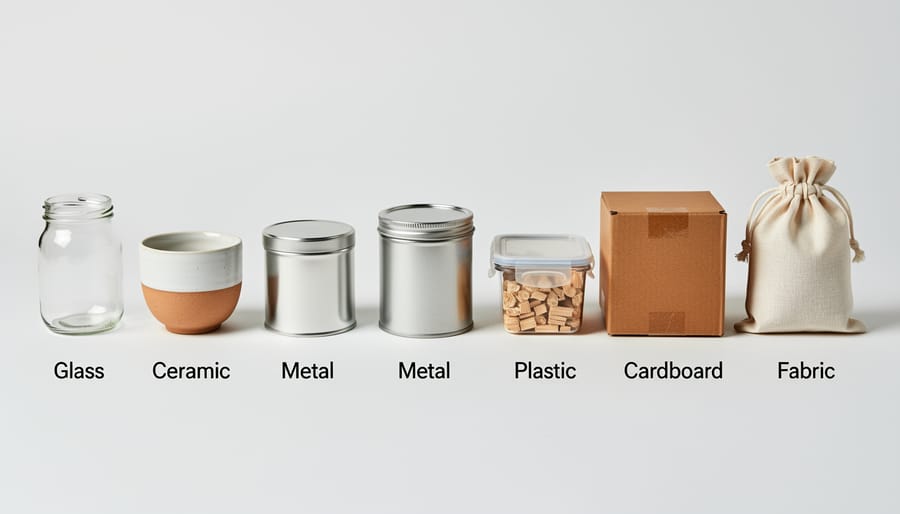
If you fall in love with a container that lacks holes, you have three options. Drill holes yourself using a masonry bit for ceramic or a regular bit for plastic. Use it as an outer decorative sleeve with a draining pot nested inside that you can lift out to water. Or create a drainage layer with two inches of gravel at the bottom and water very sparingly, though this is risky and I don’t recommend it for beginners.
Drainage in containers is foundational enough that workshops dedicate time to demonstrating why it matters. The finger test helps: if water pools on the surface after watering instead of soaking through within seconds, your drainage is insufficient.
The Right Soil Mix Makes Everything Easier
My Simple Three-Ingredient Mix
After years of experimenting, I’ve settled on a mix that’s so simple I can recite it while half-asleep: one part quality potting soil, one part compost, and one part perlite or coarse vermiculite. That’s it.
The potting soil provides the base structure and some nutrients. Compost adds organic matter and feeds beneficial microbes (plus it’s often the cheapest ingredient if you make your own). The perlite keeps everything light and airy, preventing that brick-like compaction that kills roots in containers.
I buy these ingredients in bulk at the start of each season and mix batches in a large plastic storage bin. For a standard container, I eyeball equal scoops of each component and blend them right in the bin, which takes maybe two minutes. The mix drains beautifully but holds enough moisture that I’m not watering three times a day.
This recipe works for nearly everything I grow in containers, from basil to cherry tomatoes to zinnias. The only plants I adjust it for are succulents, where I increase the perlite ratio to two parts instead of one.
Best Plants to Start With (And Which Ones to Skip)
Herbs That Practically Grow Themselves
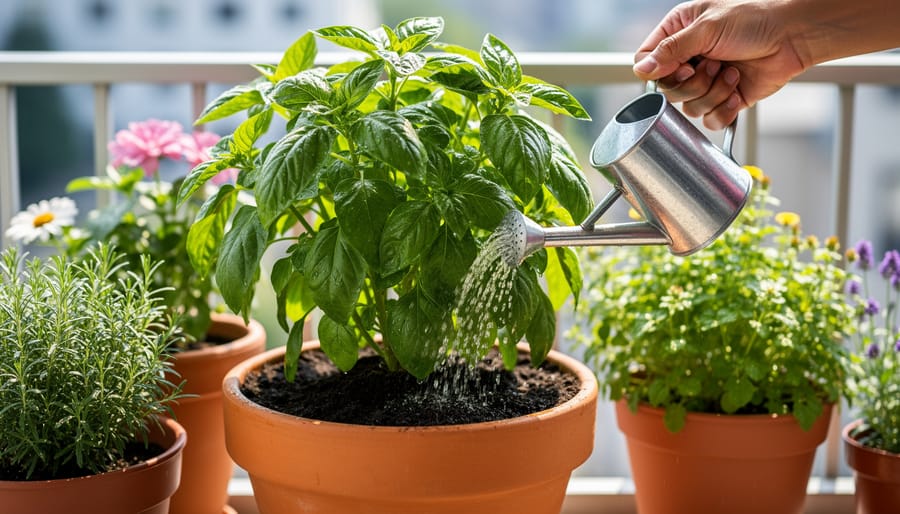
Basil deserves its reputation as the gateway herb. Give it a 10-inch pot, full sun, and regular pinching of the top leaves, and you’ll be adding fresh basil to every meal by week four. The secret: never let it flower. Pinch off those buds the moment they appear, and the plant keeps producing leaves instead of going to seed.
Mint is nearly indestructible, which makes it perfect for building confidence, but here’s the catch: it needs its own container. Plant mint with anything else and it’ll choke out its neighbors within weeks. A 12-inch pot works well, and mint actually tolerates partial shade better than most herbs. I keep mine by the back door where it gets morning sun, and I harvest by the handful for tea without worrying about over-picking.
Parsley (the flat-leaf variety) fills a deeper pot slowly but rewards patience with months of steady harvests. Use a container at least 8 inches deep and cut the outer stems first, leaving the center to keep growing. Unlike basil, parsley doesn’t mind a little shade, making it ideal for spots where six hours of direct sun isn’t possible.
Vegetables That Love Container Life
Tomatoes top every beginner’s wish list, and compact determinate varieties like ‘Patio Princess’ or ‘Tiny Tim’ thrive in 5-gallon containers. You’ll get real tomatoes, not garden-center promises, expect 10 to 15 fruits per plant through the season. Bush beans work beautifully in 12-inch pots, producing pods you can harvest in 50 to 60 days. Plant seeds an inch apart around the container’s edge for maximum yield.
Lettuce and salad greens give you the fastest reward. A wide, shallow container (8 inches deep works) filled with mixed greens lets you snip fresh salad in three weeks. Succession plant every two weeks and you’ll harvest continuously. Peppers adapt surprisingly well to containers, one plant per 3-gallon pot is plenty. Sweet bell peppers stay compact, while hot varieties often produce more than you can use.
Radishes fill gaps between slower crops. They mature in 25 days and need only 6 inches of soil depth. Cherry tomatoes outperform their larger cousins in pots, and ‘Sweet Million’ produces hundreds of fruits in a single season from one plant in a 7-gallon container.
Consider your USDA gardening zones when timing plantings. Cool-season crops like spinach and peas start early, then give way to warm-season tomatoes and peppers. Rotate containers to follow the sun as seasons shift, and your vegetables will reward the attention.

Flowers for Instant Gratification
Nothing builds momentum like watching something bloom within weeks of planting. For containers, I stick with flowers that deliver color fast and forgive the typical beginner wobbles with watering and feeding.
Marigolds top my list because they germinate in less than a week and bloom about six weeks after planting. They tolerate heat, don’t mind if you skip a watering session, and actually bloom more when you deadhead the spent flowers. Plant them in an eight-inch pot and you’ll have continuous color from late spring through the first frost.
Petunias are equally reliable, especially the newer varieties bred for containers. They cascade beautifully over pot edges and recover quickly if they dry out slightly. I’ve found that pinching back the stems once when they’re about six inches tall creates bushier plants with more blooms.
Zinnias are my third go-to because they grow so fast you can practically watch them. From seed to flower takes about two months, and they keep producing if you cut stems for indoor arrangements. They need full sun and decent drainage, but that’s about it.
If you want guaranteed success with beginner flowers choose one variety, plant three to five in a 12-inch container, and resist the urge to mix too many types. You can always expand your collection once you see how satisfying that first flush of blooms feels.
Watering Without Drowning (Or Drying Out) Your Plants
When Daily Watering Isn’t Enough
Some containers dry out faster than physics seems to allow. Cherry tomatoes in small terracotta pots, herbs on sun-baked balconies, anything in those cute six-inch decorative containers, they’ll wilt between breakfast and dinner on a hot June day.
The finger-in-soil test still applies, but when you’re checking twice daily and still finding bone-dry soil, you need a different approach.
Self-watering containers solve this by storing water in a reservoir below the soil. The plant draws moisture up through wicking as needed. You fill the reservoir every few days instead of surface-watering daily. They’re brilliant for thirsty plants like tomatoes and for anyone who travels or works long hours.
You can buy ready-made self-watering pots or convert existing containers with inserts. I use both. The commercial ones work beautifully, but a simple DIY version, a smaller pot nested inside a larger one with a water reservoir between, costs next to nothing.
For smaller pots that dry out quickly, group them together. This creates a microclimate with higher humidity and reduces individual evaporation. Move the most vulnerable containers to morning-sun-only spots during heat waves, and consider saucers that hold a shallow water reserve for especially hot weeks.
Feeding Your Container Plants
Container plants live in a closed environment where nutrients wash out with every watering. Unlike ground plants that can send roots through fresh soil to find what they need, your containers rely entirely on what you give them. After about six weeks, most potting mixes have given up everything they had.
I learned this the hard way when my first tomato plant looked gorgeous for a month, then slowly went pale and stopped growing. Turns out I’d starved it without realizing.
The simplest approach for beginners is a balanced liquid fertilizer diluted to half the package strength. Feed every two weeks during the growing season. Half-strength might sound weak, but it prevents the salt buildup that can burn roots in the confined space of a pot. You’ll find this approach covered alongside other essentials in container fertilizing guidance offered through community workshops like the one at Mel Lloyd Centre.
Slow-release granules offer another route if you forget regular feedings. Mix them into the top inch of soil at planting time, and they’ll release nutrients over several months. I use these for my flowers and save liquid feeds for vegetables that need more control.
Watch your plants rather than the calendar. Pale leaves, slow growth, or weak stems usually mean hunger, while dark green leaves with few flowers might signal too much nitrogen. Heavy feeders like tomatoes and peppers need weekly feeding once they start flowering. Herbs actually prefer leaner conditions, so every three weeks suits them fine.
Keep a small bottle of liquid fertilizer near your watering can. When it becomes part of your routine along with your other gardening tools you’ll stop overthinking it.
Where to Put Your Containers for Success
The spot you choose for your containers matters more than the fancy pot or exotic plant you pick. I learned this the hard way when I excitedly placed a full-sun tomato on my shaded balcony and wondered why it produced exactly three sad cherry tomatoes all season.
Start by tracking sunlight in your intended spot for a full day. Full sun means six or more hours of direct sunlight, partial sun is four to six hours, and shade is less than four. Your phone’s timer works perfectly for this. Check at 9 AM, noon, 3 PM, and 6 PM to see where the sun actually hits. Buildings, trees, and overhangs create shade patterns that shift throughout the day and change with the seasons.
Wind is the silent container killer. An exposed balcony or rooftop can dry out soil in hours and snap stems you thought were sturdy. If your space is windy, cluster containers together to create mutual wind protection, choose heavier pots that won’t tip, and opt for sturdy plants over delicate ones. A simple test: if you need to hold your hair back when you’re out there, your plants will struggle.
Think about accessibility before your back reminds you. Place containers where you can reach them easily for watering, harvesting, and deadheading without awkward stretching or climbing. If you have young children or pets exploring your container garden, review basic garden safety tips to keep everyone safe around your plants.
Your containers need to live where you’ll actually see and tend them, not tucked away where they become out of sight, out of mind.
Learning From the Community
One of my favourite parts of container gardening is discovering I’m not alone in figuring this stuff out. When I killed my third basil plant in a row, a conversation with another gardener revealed I’d been watering at noon in full sun, basically steaming the roots. That five-minute chat saved me months of frustration.
Your local community likely has more resources than you’d expect. Libraries, community centres, and garden clubs regularly host container gardening workshops, especially as interest grows. The free workshop at Shelburne’s Mel Lloyd Centre on June 17, 2026, is exactly the kind of local event worth searching for in your area. A quick check of your city or town’s events page often reveals similar opportunities.
Online, container gardening forums and Facebook groups offer daily support. I’ve found r/containergardening particularly helpful for troubleshooting specific problems, post a photo of yellowing leaves at breakfast, get three solid diagnoses by lunch. The real-time feedback is invaluable when you’re learning.
Here at Plant Geek, our community section lets you share photos, ask questions, and swap experiences with other container gardeners at all levels. The collective knowledge in these spaces shortcuts your learning curve dramatically. Someone has already made the mistake you’re about to make, and they’re usually happy to help you avoid it.
Start with one connection, one workshop, one forum post, one question in our community. Container gardening gets easier when you realize thousands of people are figuring it out alongside you.
Container gardening isn’t about having the perfect setup or unlimited space. It’s about bringing plants into your life in whatever way fits. You don’t need a yard, a green thumb, or even much time. You just need one container, some soil, and the willingness to try.
I’m still learning with every season. Right now I’m testing whether my cherry tomatoes will actually produce more in fabric pots versus terracotta, and I’ve got basil experiments running on three different windowsills. Some things thrive, others teach me what not to do next time. That’s the whole point.
Start small. Pick one or two containers that make you excited, choose plants that sound appealing, and see what happens. You’ll make mistakes, we all do, but you’ll also experience the genuine satisfaction of growing something with your own hands.
The beauty of container gardening is that it scales with you. Today it might be a single pot of herbs on your balcony. Next month, maybe a tomato plant joins them. By next year, you might have a whole collection, each one a small success story.
I’d love to hear how your container garden evolves. Share your wins, your questions, and even your “what went wrong” moments in the comments. We’re all learning together, one container at a time.