

Improving a large lawn demands a fundamentally different strategy than maintaining a small yard. Where compact spaces let you hand-weed and spot-treat problem areas, expansive turf requires zone-based planning, efficient equipment selection, and a systematic schedule that prevents small issues from becoming acre-wide headaches. The difference isn’t just scale; it’s a shift from reactive fixes to proactive management across distinct sections of your property.
I learned this the hard way when I moved from a cozy suburban lot to a two-acre homestead five years ago. My trusty push mower and weekend touch-ups suddenly meant marathon sessions that left problems festering in the far corners. The breakthrough came when I started treating my lawn like the large landscape it was: dividing it into zones based on sun exposure and traffic patterns, investing in a riding mower with adjustable deck height, and creating a rotation plan that addressed each area’s specific needs rather than trying to blanket-treat everything at once.
The good news? Once you understand the unique challenges of large lawn care, you can build a sustainable routine that actually saves time compared to constant crisis management. This approach works whether you’re dealing with patchy growth, uneven watering, compacted soil in high-traffic zones, or simply feeling overwhelmed by the sheer square footage. Our community has shared countless success stories about transforming exhausted expanses into thriving green spaces using these targeted methods, and I’m excited to walk you through the same step-by-step process that works for properties of every size and condition.
What You’ll Need: Equipment and Materials for Large-Scale Lawn Improvement
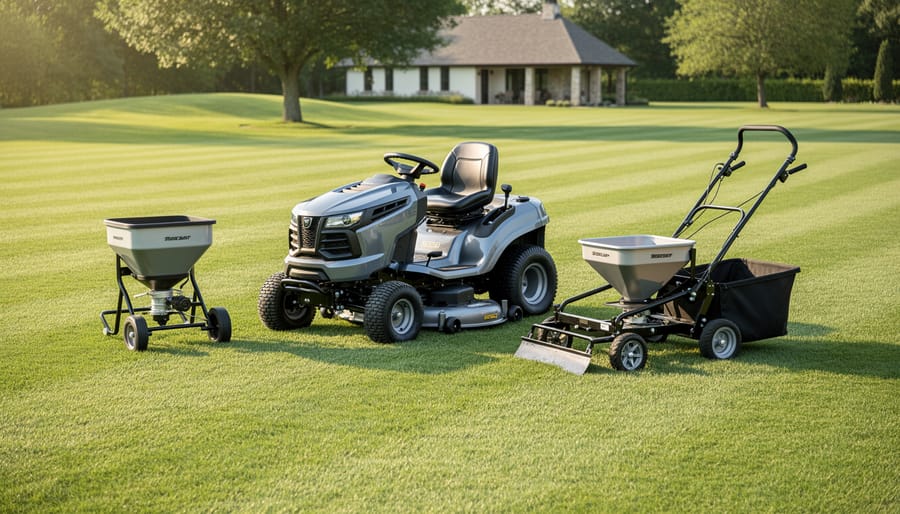
When you’re tackling lawn improvement at scale, your equipment list looks dramatically different than what works for a modest backyard. I learned this the hard way when I tried using my old push spreader on a three-acre property, what should’ve taken an afternoon stretched into a week-long ordeal that left my shoulders aching and my results patchy.
The reality is that large lawns demand efficiency and consistency across vast areas. A riding mower or zero-turn mower isn’t a luxury; it’s the difference between spending three hours per week on mowing versus an entire day. Similarly, a broadcast spreader that attaches to your mower or an ATV transforms fertilizing from a marathon event into a manageable task that ensures even coverage without the fatigue-induced mistakes that plague hand-spreading.
Here’s what you’ll actually need, organized by the improvement tasks ahead:
- Mowing: Riding mower or zero-turn mower (minimum 42-inch deck for properties over one acre), string trimmer for edges
- Soil improvement: Core aerator (rent or tow-behind model), soil test kit, compost or organic matter, pH adjusters (lime or sulfur as needed)
- Seeding: Broadcast spreader (tow-behind or hand-crank), grass seed suited to your climate and sun exposure, rake for seed-to-soil contact
- Fertilizing: Large-capacity broadcast spreader, slow-release granular fertilizer calibrated for your lawn size
- Watering: Impact or traveling sprinklers for large zones, hose timer, rain gauge to monitor coverage
Don’t forget basic hand tools like the best gardening rakes for dethatching small problem areas and working seed into bare patches, they’re invaluable for detail work even when machines handle the bulk.
You won’t need everything on day one. Start with mowing and soil testing equipment, then add tools as you progress through each improvement phase. Renting specialized equipment like aerators for occasional use often makes more financial sense than buying, especially when you’re just starting your lawn transformation journey.
Safety and Weather Considerations Before You Begin
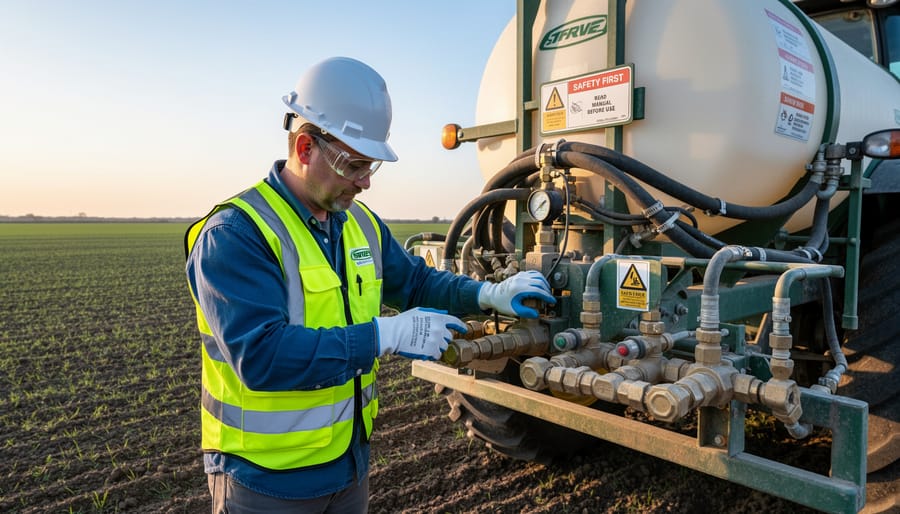
Before you dive into transforming your large lawn, let’s talk about staying safe and working smart. I learned this the hard way after spending eight hours aerating in July heat, not my finest moment, and definitely not something I’d recommend.
Large equipment demands respect and attention. Riding mowers and zero-turn models can tip on slopes steeper than 15 degrees, and they require different handling than push mowers. Always read the operator’s manual before first use, keep hands and feet clear of moving parts, and never disable safety switches. When operating spreaders or spray equipment, wear gloves and long sleeves to avoid skin contact with fertilizers and amendments, especially when covering acres rather than square feet.
Weather timing matters more than most people realize. The ideal temperature window for most lawn improvement work sits between 50 and 75 degrees Fahrenheit. Avoid applying seed or fertilizer right before heavy rain, which washes materials into runoff, or during drought stress when grass can’t recover from aeration. Early morning work beats midday heat every time, both for your comfort and for reducing plant stress.
Physical strain sneaks up on you with large projects. What seems manageable for an hour becomes exhausting by hour three. Break big jobs into multiple days rather than pushing through, stay hydrated even when the temperature feels moderate, and don’t hesitate to call professionals for tasks requiring specialized equipment like soil grading or irrigation installation. Your lawn will still be there tomorrow, and you’ll do better work when you’re not exhausted.
Step-by-Step Process to Transform Your Large Lawn
Step 1: Assess Your Lawn’s Current Condition
You can’t fix what you don’t understand, so start by walking your property with a notepad or phone camera. I learned this the hard way after dumping fertilizer across my entire two-acre lawn only to discover half of it had a pH problem that made the nutrients useless.
Begin with a visual survey, dividing your property into sections as you go. Note where grass looks thin, patchy, or discolored. Mark areas that stay soggy after rain or dry out faster than others. These drainage clues tell you where water management needs attention before any other improvements will stick.
Grab a soil test kit from your extension office or a reliable online source. For large lawns, test multiple zones rather than one sample for the whole property. I take samples from at least four different areas, especially where grass quality varies noticeably. Dig down three to four inches, mix soil from several spots in each zone, and follow the kit instructions exactly.
While you’re out there, inspect closely for signs of pests like grub damage (grass that peels back like carpet) or disease spots with unusual patterns or colors. Check your grass density by kneeling down and looking at how much soil shows through. Sparse coverage means you’ll need overseeding, but not until you’ve addressed whatever caused the thinning in the first place.
Step 2: Develop a Zone-Based Improvement Plan
Once you’ve evaluated your lawn’s condition, resist the temptation to tackle everything at once. Instead, sketch a simple map dividing your property into distinct zones, I learned this lesson after exhausting myself trying to fix ten acres simultaneously during my first summer at our new place.
Start by identifying areas that receive full sun versus shade, since these require different grass varieties and care schedules. Next, mark high-traffic zones near pathways, play areas, or shortcuts people naturally take across the lawn. These spots need hardier grass and more frequent attention than seldom-used perimeter areas.
Now assess problem severity within each zone. Maybe the northwest corner has compacted clay requiring aggressive aeration, while the eastern section just needs overseeding. Different tools, from specialized rakes by soil type to heavy aerators, work better in specific conditions, so grouping similar problems together streamlines your workflow.
Finally, assign priority rankings. Focus first on highly visible areas near your home or where guests gather, then move to secondary zones. This zone-based system lets you celebrate visible wins quickly while spreading the workload across seasons, preventing burnout and allowing you to refine techniques before applying them property-wide.
Step 3: Address Soil Health Through Aeration and Amendment
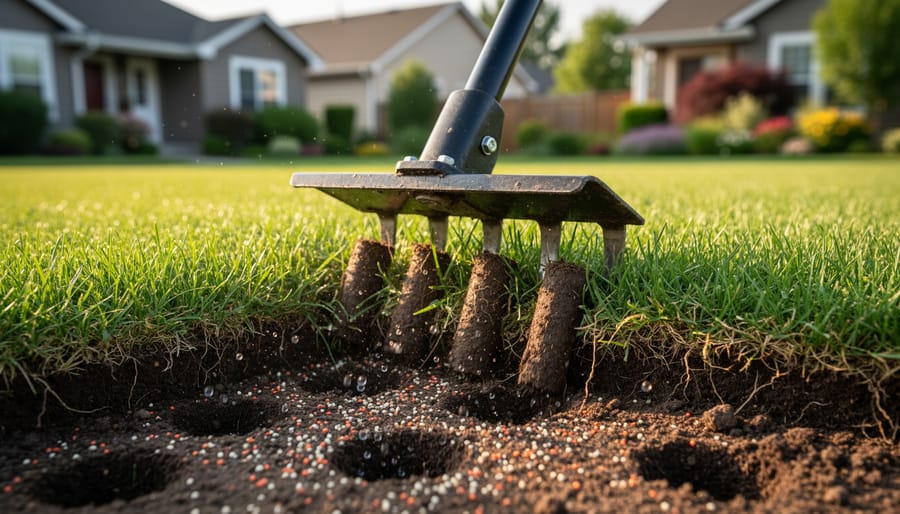
Healthy soil is the foundation of any great lawn, and aeration creates the breathing room your grass roots desperately need. For large properties, rent or invest in a core aerator, walk-behind models work for smaller zones, but tow-behind aerators attached to a riding mower cover ground far faster and reduce physical strain. Make two passes in perpendicular directions to ensure thorough coverage, and don’t worry about the soil plugs left on the surface, they’ll break down naturally and return nutrients to the lawn.
Timing matters enormously. Cool-season grasses benefit most from fall aeration, while warm-season varieties respond best to late spring efforts. The best time to aerate coincides with your grass’s peak growing period, giving it the energy to recover quickly and exploit the improved soil structure.
Once you’ve aerated, apply amendments based on your soil test results. Spread compost at half an inch across the lawn using a topdresser or the back of a landscaping rake, it feeds microbes and improves structure over time. If your pH needs correction, adjust pH with lime or sulfur using a broadcast spreader calibrated to your test’s recommendations. Water everything in thoroughly to move amendments into those fresh aeration holes.
Step 4: Overseed Bare and Thin Areas Strategically
After addressing your soil’s foundation, the next critical step is getting grass to fill those bare and patchy zones that plague large properties. Start by selecting seed varieties matched to your specific conditions, cool-season grasses like tall fescue or perennial ryegrass for northern climates, warm-season types like bermudagrass or zoysia for southern regions. Check your seed label for germination rates above 85% and minimal weed seed content.
Timing makes or breaks overseeding success. For cool-season grasses, late summer to early fall provides ideal germination windows, as overseeding cool-season timing research confirms. Warm-season varieties perform best when soil temperatures consistently reach 65°F in late spring.
Prepare large seed beds efficiently by first mowing problem areas short, around two inches, and removing debris with yard cleanup tools to expose soil. Use a broadcast or drop spreader calibrated to your seed’s recommended rate, typically four to eight pounds per 1,000 square feet for overseeding. Walk in overlapping passes to avoid gaps.
The secret to germination is seed-to-soil contact. After broadcasting, drag a section of chain-link fence behind your mower or use a lawn roller set to light pressure. Keep seeded areas consistently moist, not soggy, with brief, frequent watering until seedlings reach mowing height.
Step 5: Implement a Large-Scale Fertilization Program
Feeding a large lawn demands precision and consistency, haphazard application wastes product and creates those embarrassing dark green stripes everyone notices from the street.
Start by choosing granular fertilizer for large properties. It’s more economical at scale, stores easily, and requires fewer applications than liquid alternatives. Calculate your lawn’s square footage by breaking it into zones, then determine product needs based on the nitrogen percentage listed on the bag. A 50-pound bag of 20-4-8 fertilizer typically covers 10,000-15,000 square feet.
Calibrate your broadcast spreader before every application. Walk a measured 100-foot section with the hopper empty to establish your pace, then fill it and adjust settings according to manufacturer charts. Make overlapping passes without doubling coverage, I mark my path with a small flag every few rows to stay oriented.
Apply fertilizer in early morning when grass is dry but soil holds moisture. Split heavy applications into two lighter passes running perpendicular directions for uniform coverage. Leave a 10-foot buffer around water features and property edges to prevent runoff.
Time applications strategically: cool-season grasses need feeding in early fall and late spring, while warm-season varieties thrive with summer applications. Never fertilize stressed, drought-stricken, or dormant grass, you’ll burn it badly and waste money.
Step 6: Establish Efficient Watering Systems
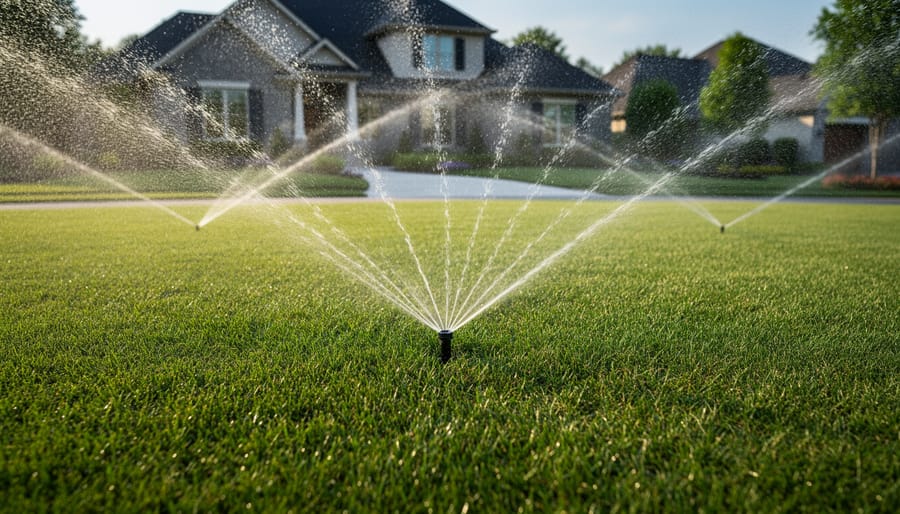
Watering a large lawn efficiently means choosing systems that deliver deep moisture without constant manual effort. In-ground irrigation systems offer the ultimate convenience, once installed, they automate coverage across zones and reduce waste through programmable timers. If that’s not in your budget yet, impact sprinklers cover impressive distances (up to 90 feet diameter) and work well for open areas, while traveling sprinklers follow your hose path to methodically water sections without you standing there.
The goal is deep, infrequent watering rather than daily spritzing. Your lawn needs about one inch of water per week, including rainfall, which translates to roughly six inches of soil penetration. I learned this the hard way when my grass developed shallow roots from frequent light watering. Set out empty tuna cans to measure how long your sprinklers take to deliver an inch, then water once or twice weekly in early morning to minimize evaporation.
Adjust seasonally, spring may need less as rain increases, while summer demands consistent deep watering during dry stretches. Fall watering prepares grass for winter without encouraging late growth.
Step 7: Create a Sustainable Mowing and Maintenance Routine
Once you’ve invested time improving your lawn’s health, a smart mowing routine protects that investment. Set your mower deck between 3 and 4 inches for most cool-season grasses, or 2 to 3 inches for warm-season varieties. Higher cutting encourages deeper roots and shades out weeds naturally.
For large properties, plan your mowing pattern to minimize turns and wasted passes. I alternate directions each week, mowing north-south one time and east-west the next, which prevents soil compaction and keeps grass standing upright. On my three-acre lawn, this simple pattern switch saves about 20 minutes per session.
Leave clippings on the lawn unless they clump heavily. They return nitrogen to the soil and reduce your fertilizer needs by roughly 25 percent over a season. If you’re mulching properly, you shouldn’t see windrows of cut grass behind your mower.
Commit to mowing every five to seven days during peak growth, never removing more than one-third of the blade height at once. Mark your calendar for quarterly equipment maintenance checks, monthly fertilizer applications, and seasonal aeration. Consistency beats perfection when you’re managing large areas.
How to Know Your Lawn Improvement Is Working
Tracking your lawn’s progress gives you concrete proof that your efforts are paying off and helps you catch problems early. The most reliable indicators appear in a predictable sequence rather than all at once.
Within two to three weeks of overseeding, you’ll notice the first signs of germination in treated areas. Look for a light green fuzz appearing across bare patches where new grass is establishing. By four to six weeks, these areas should show noticeably thicker coverage, though the new grass will still be lighter in color than established sections.
Color improvement typically follows density gains. A lawn recovering from neglect transitions from pale yellow-green to a richer, more vibrant green over six to eight weeks as the root systems strengthen and nutrient uptake improves. This change becomes most obvious when you compare photos taken monthly rather than relying on daily observation.
Water absorption provides another clear signal. Before improvement efforts, large lawns often develop pooling areas or runoff during irrigation. As aeration opens compacted soil and root systems expand, water should penetrate more quickly and evenly. Run your irrigation system and watch whether puddles disappear faster than they did two months earlier.
Weed presence tells its own story. A healthier, denser lawn naturally crowds out opportunistic weeds. You should see fewer dandelions, clover, and crabgrass establishing in treated zones within three months. If weed populations increase instead, your grass may need additional nutrients or adjusted mowing height to compete more effectively.
Take monthly photos from the same spots across your property. This documentation removes guesswork and shows whether you’re maintaining forward progress or need to adjust your fertilization timing, watering frequency, or overseeding approach before the next growing season.
Common Questions About Large Lawn Improvement
I’ve heard so many of you share similar worries when tackling a large lawn project, and honestly, these questions come up in nearly every conversation I have about lawn improvement. Let me address the ones that pop up most often.
How much will it cost to improve a 2-acre lawn?
Budget $1,500 to $4,000 for a comprehensive improvement project on 2 acres, including equipment rental, soil amendments, quality seed, and fertilizer. Your costs drop significantly if you already own a riding mower and spreader, and you can reduce expenses by tackling one zone at a time rather than the entire property at once.
Can I improve my lawn in sections over time?
Absolutely, and I actually recommend this approach for most large properties. Focus on your highest-priority or most-visible zone first, get it looking great, then move to the next section the following season. This spreads out both the financial investment and the physical workload while letting you learn what works best on your specific property.
What’s the best season to start lawn improvement?
Early fall is ideal for cool-season grasses because soil stays warm while air temperatures cool, promoting strong root growth before winter. For warm-season grasses, late spring works best when soil temperatures reach 65°F consistently and you have the full growing season ahead.
How do I maintain improvements without constant work?
Set up systems that work on autopilot: install irrigation timers, establish a every-five-to-seven-day mowing routine during peak season, and apply slow-release fertilizer that feeds for months rather than weeks. The key is creating habits and systems rather than relying on daily attention.
The time investment question deserves special attention because it catches people off guard. Plan on 15 to 25 hours of active work for the initial improvement phase on each acre, spread across several weeks. After that, maintenance drops to roughly one hour per acre weekly during growing season, assuming you have efficient equipment. A friend of mine improved his 3-acre property over two years, dedicating weekends to one zone at a time, and now maintains the whole thing in about three hours weekly with his zero-turn mower and programmed irrigation.
Remember that large lawn improvement is a marathon, not a sprint. The properties that look consistently amazing didn’t get that way overnight, and their owners learned to work smarter rather than harder as they figured out what their specific grass and soil needed.
Transforming a large lawn isn’t a weekend project, and that’s perfectly okay. I learned this the hard way when I tackled my own sprawling backyard, expecting miracles in a month left me frustrated until I adjusted my timeline and celebrated small wins along the way. The zone-based approach we’ve covered gives you a realistic framework to chip away at improvements without burning out or breaking the bank.
Remember, even professional groundskeepers work in phases. Your lawn didn’t develop its current challenges overnight, and reversing them takes patience and consistent effort. Some areas will respond quickly while others need a full growing season to show real change.
The beauty of a large property is the opportunity to experiment and create diverse spaces, perhaps you’ll even landscape with flowers in sections that prove too challenging for turf.
I’d love to hear about your large lawn journey. What’s your biggest challenge? Have you found strategies that work particularly well for your property? Drop a comment below and let’s learn from each other’s experiences. There’s nothing quite like community wisdom when tackling big projects.